Creating GIFs has become a popular form of expression in today’s digital age, offering a fun and creative way to communicate and share moments. Whether you’re using your phone, PC, or Mac, learning how to create GIFs opens up a world of possibilities for adding flair to your messages and social media posts.
In this Techblogwiki guide, we’ll explore various methods and tools available for crafting GIFs on different devices, providing step-by-step instructions to help you get started. Creating GIFs has always been challenging, from capturing videos to converting images always challenging.
Whether you’re a beginner looking to dip your toes into the world of GIF-making or a seasoned creator seeking new techniques, this guide will equip you with the knowledge and skills needed to unleash your creativity and make eye-catching GIFs that stand out.
So, let’s dive in and discover how to create GIFs on your phone, PC, and Mac!
What is Graphics Interchange Format (GIF)?
The Graphics Interchange Format (GIF) is a popular image file format widely used for creating animated images, commonly known as GIFs. Developed by CompuServe in the late 1980s, GIFs support static and animated pictures and have become ubiquitous on the internet, social media platforms, and messaging apps.
GIFs are characterized by their ability to store multiple frames within a single file, allowing them to display a sequence of images in a looped animation. This animation effect is achieved by cycling through the frames at a specified speed, creating the illusion of movement or action.
One of the key features of GIFs is their support for transparency, allowing parts of an image to be transparent, which can help overlay GIFs onto other content or create visually appealing effects.
Due to their small file size and broad compatibility across different platforms and devices, GIFs have become famous for expressing emotions, sharing memes, conveying information, and adding visual interest to digital communication.
How to Create GIFs on Your Phone?

Creating GIFs on your phone is relatively easy and can be done using various apps available on both iOS and Android devices. Here’s a general overview of the steps involved:
1. Choose a GIF-Making App: Start by selecting a GIF-making app from the App Store (iOS) or Google Play Store (Android). Numerous options are available, such as GIPHY Cam, GIF Maker, ImgPlay, and more.
2. Capture or Select Video: Use the app to capture a new video using your phone’s camera or select an existing one from your device’s gallery.
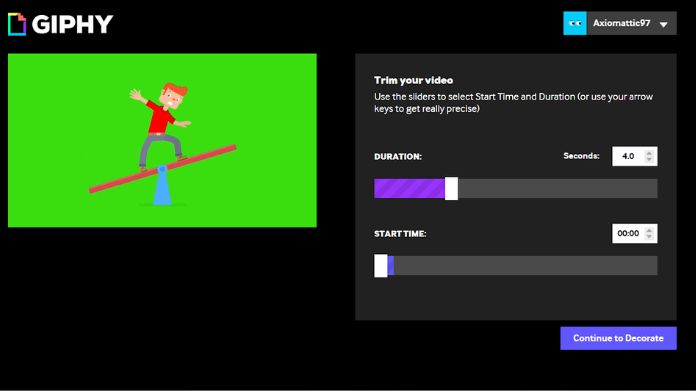
3. Edit and Customize: Once you’ve chosen the video, you can edit it to create your desired GIF. Most apps allow you to trim the video to the desired length and add filters, text, stickers, and other effects to enhance your GIF.
4. Convert to GIF: After editing, convert the video into a GIF format using the app’s conversion tools. Before finalizing the conversion, you can typically adjust settings such as loop duration, playback speed, and quality.
5. Save and Share: Once satisfied with your GIF, save it to your device’s gallery or share it directly to social media platforms, messaging apps, or other channels.
Following these steps, you can easily create GIFs directly from your phone to express yourself creatively and share fun moments with others.
How to Create GIFs on Your PC?

Creating GIFs on your PC can be done using various online and offline software applications. Here’s a general guide on how to make GIFs on your PC:
1. Choose a GIF-Making Tool: Several software options are available for creating GIFs on your PC. Some popular choices include Adobe Photoshop, GIMP, EZGIF, and online platforms like GIPHY.
2. Select or Create Content: Decide whether you want to use existing images videos, or create new content. You can utilize photos, video clips, or screen recordings as the basis for your GIF.
3. Edit and Customize: If necessary, edit your content to fit the desired size and duration for your GIF. You can use editing tools within your chosen software to crop, resize, and apply effects to your images or videos.
4. Convert to GIF Format: Once you’ve prepared your content, use the GIF-making tool to convert it into GIF format. In most software applications, select the frames or video segments you want to include in the GIF and export them as a GIF file.
5. Adjust Settings: Depending on the software you’re using, you may have options to adjust settings such as frame rate, playback speed, and quality. Make any necessary adjustments to ensure your GIF looks how you want it to.
6. Save and Share: After creating your GIF, save it to your PC’s storage. You can share it online via social media, email, or messaging apps or use it in your projects and presentations.
Following these steps and using the appropriate software tools, you can easily create custom GIFs on your PC to express yourself creatively and enhance your online content.
How to Create GIFs on Your Mac?
Creating GIFs on your Mac is straightforward and can be done using various methods. Here’s a general guide on how to make GIFs on your Mac:
1. Use Built-in Tools: macOS includes built-in features that allow you to create GIFs from existing content, such as videos or image sequences. You can use apps like QuickTime Player or Preview to make GIFs.
2. Record a Screen: If you want to create a GIF from a specific activity on your screen, you can use the built-in screen recording feature on macOS. Press Command + Shift + 5 to access the screen recording tool, then select the area of the screen you want to record and start recording. Once finished, you can convert the recorded video to a GIF using third-party software.
3. Use Third-party Software: Several third-party applications specializing in creating GIFs are available for Mac. Some popular options include GIF Brewery, GIPHY Capture, and Photoshop. These applications offer more advanced features for building and editing GIFs than built-in tools.
4. Edit and Customize: Regardless of your chosen method, you’ll likely have options to edit and customize your GIF. You can trim the video, adjust the frame rate, add text or effects, and more to create the desired GIF.
5. Export and Share: Once you’ve created and customized your GIF, export it to save it to your Mac’s storage. You can share it online via social media, email, or messaging apps or use it in your projects and presentations.
Following these steps and using the appropriate software tools, you can easily create custom GIFs on your Mac to express yourself creatively and enhance your online content.
Final Note
Creating GIFs has become more accessible, with various tools available for different devices. Whether you’re using your phone, PC, or Mac, software applications and online platforms cater to your needs.
Following the steps outlined in this guide, you can unleash your creativity and craft GIFs that capture moments, express emotions, or convey information dynamically and engagingly.
Experiment with different content, explore editing options and don’t be afraid to let your imagination run wild. With the ability to create GIFs on any device, you have the power to add an extra dimension to your digital communication and storytelling.
So dive in and start creating GIFs that will make an impact!


